
I was very excited to get the chance to try the Spellbinders January 2019 card kit. This is my first experience of using a card kit and I was really impressed. The kit is packed full with everything you need to make at least 10 cards. It’s definitely possible to make more, though.
The Spellbinders card kit is a monthly subscription. You can also purchase the kit extras separately, if you only want select items or would like more embellishments.
Spellbinders have several Value Club options available for those who would like to join multiple clubs at once.
The January 2019 card kit is called ‘You’re My Type’. This is a Valentine’s / Love themed box, and contains the following items:
- 10 textured white card bases with envelopes
- Set of 11 dies
- Patterned paper pad
- Stamp set
- Sequins
- 9 pieces of card stock
- Die cut shapes
- Stickers
- Double sided tape
- Foam squares
I used the kit to make 10 cards, all on the same day. I’ve don’t usually make that many cards in one go but I found it really quick and easy to create beautiful cards using this kit.
The only items I used in addition to the kit contents were:
- Liquid adhesive (for the sequins and smaller embellishments)
- Foam tape (I like to use a lot of foam tape so needed more than was included in the kit)
- Black fineliner pen
- Versafine onyx black ink
- Spellbinders Platinum 6 die cutting machine
- Stamping platform (to help with stamping on the textured card bases)
Here are the cards I made:
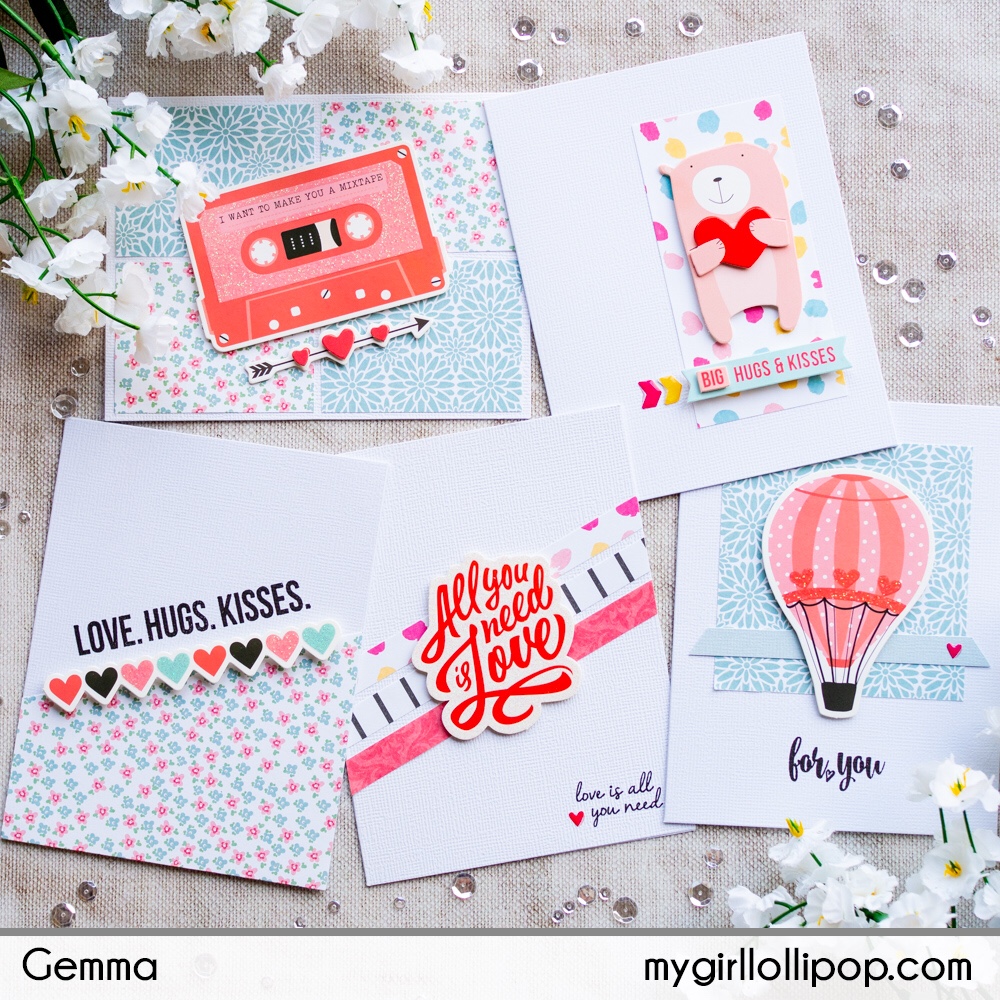
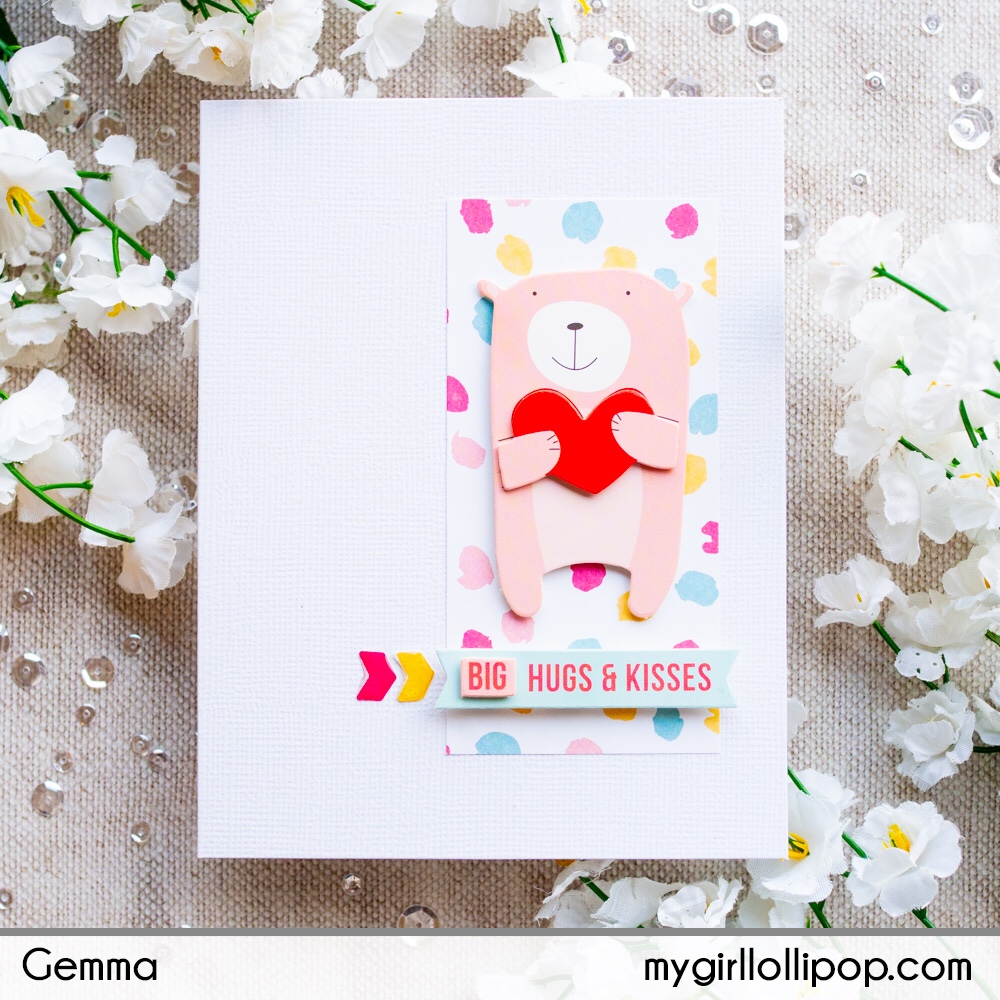
Card 1 – Big Hugs & Kisses:
- Cut a piece of patterned paper to 2 x 4”. Adhere onto the card base.
- Add the bear and banner 3D stickers over the top of the patterned paper with foam squares.
- Add 2 of the chevron stickers next to the banner.
Card 2 – Row of Hearts:
- Cut a piece of patterned paper to 4 1/4 x 3 1/4”.
- Cut the patterned paper along the top at a diagonal, with the shortest side now 1 7/8”. Adhere onto the card base.
- Stamp a greeting on the card base along the diagonal with black ink.
- Using foam squares, add the row of hearts die cut shape underneath the stamped sentiment, along the diagonal edge of the patterned paper.

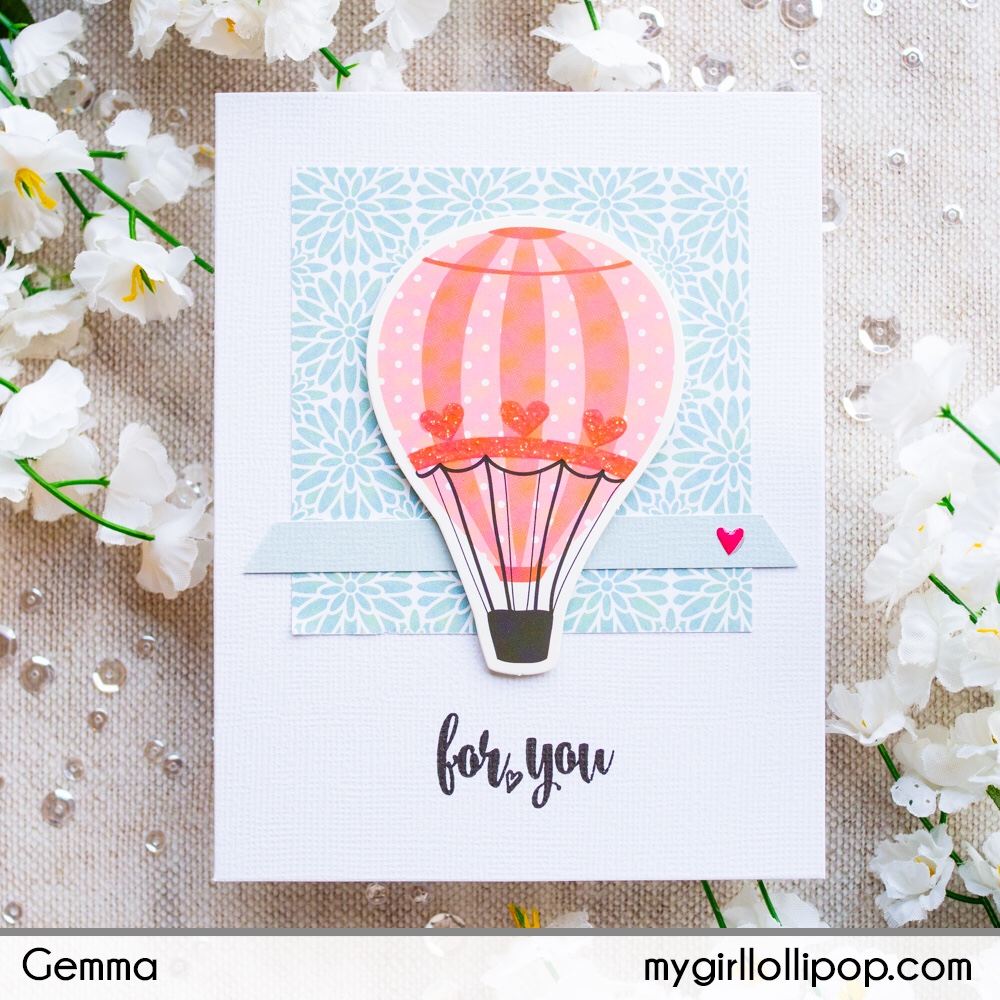
Card 3 – Hot Air Balloon:
- Cut a piece of patterned paper to 3 1/4” square. Adhere onto the card base.
- Cut a 3/8” banner of blue card and cut at an angle on both ends. Adhere over the patterned paper.
- Add the hot air balloon die cut shape with foam squares and a small heart sticker on the banner.
- Stamp a sentiment with black ink.
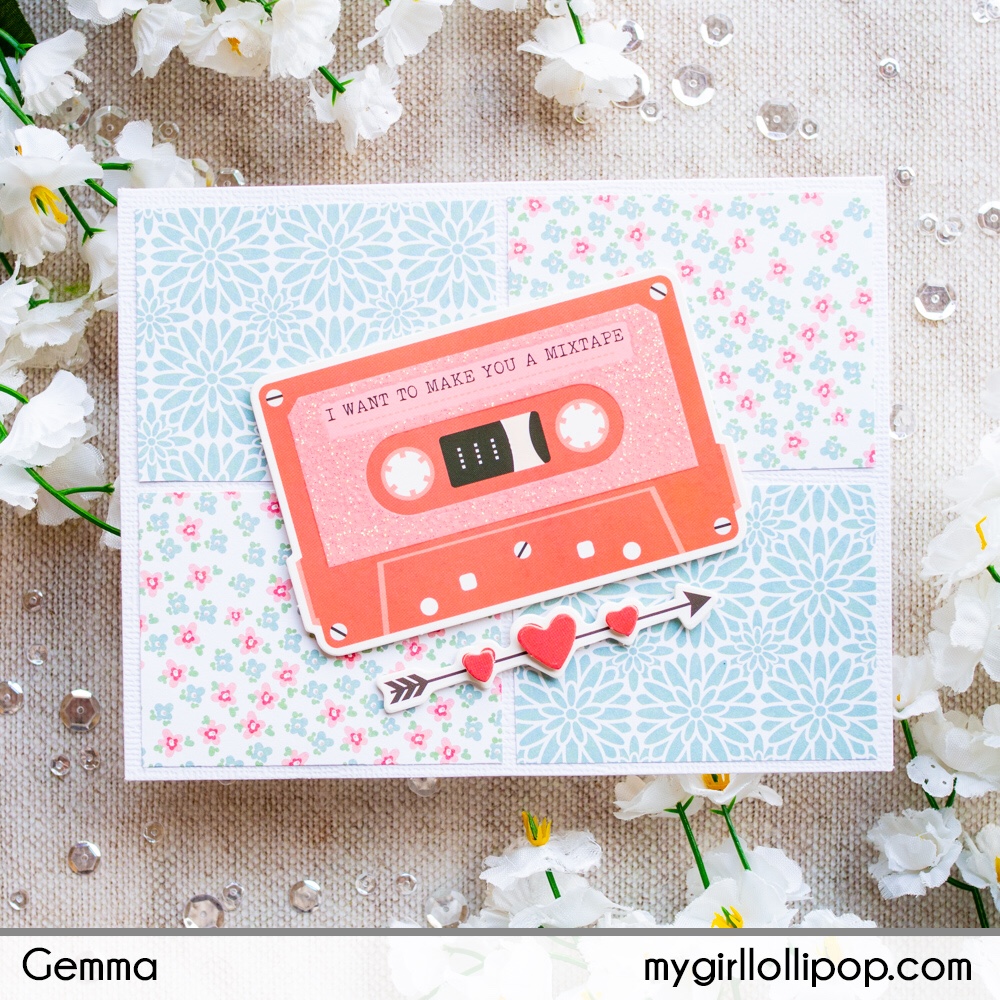
Card 4 – Mixed Tape:
- Cut 4 rectangles of patterned paper, 2 1/2 x 2”. Adhere onto the card base.
- Add the cassette tape die cut shape to the card at an angle with foam squares.
- Add the 3D heart arrow sticker underneath.
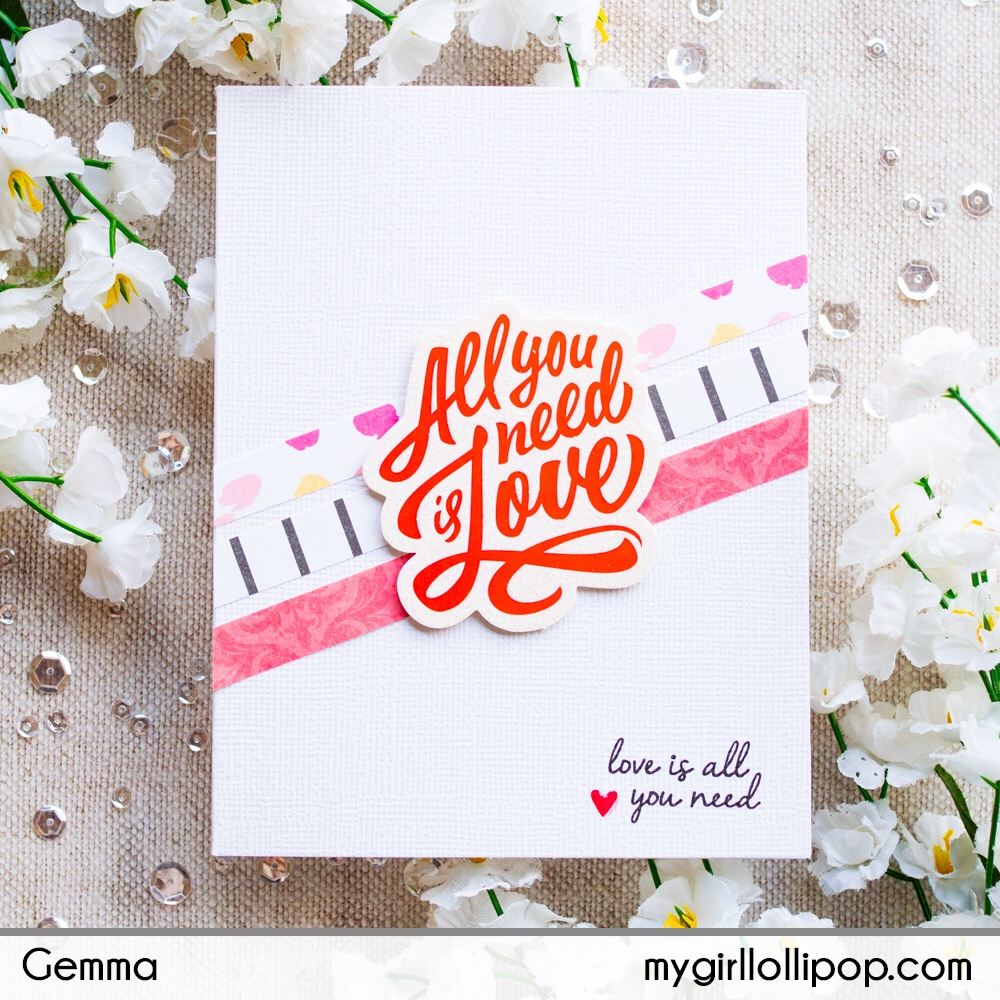
Card 5 – All You Need is Love:
- Cut 3 strips of patterned paper, each 3/8” wide. Adhere onto the card at a diagonal.
- Add the die cut sentiment shape on top with foam squares.
- Stamp a sentiment with black ink and add a small heart sticker.
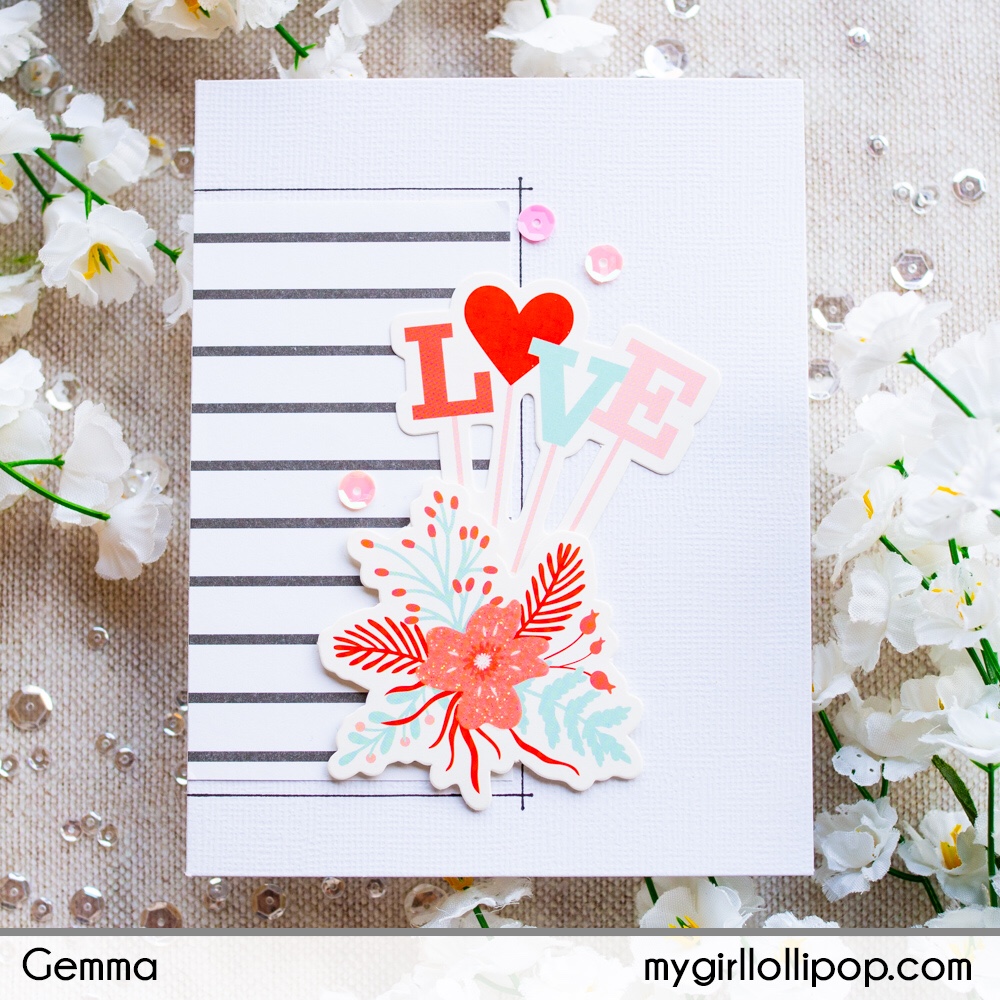
Card 6 – Floral Love:
- Cut a piece of patterned paper to 2 1/4 x 4”. Adhere onto the card base.
- Draw a black frame around the patterned paper with a black pen.
- Add the Love word die cut shape flat on the card, then the floral die cut shape with foam squares.
- Add some sequins.
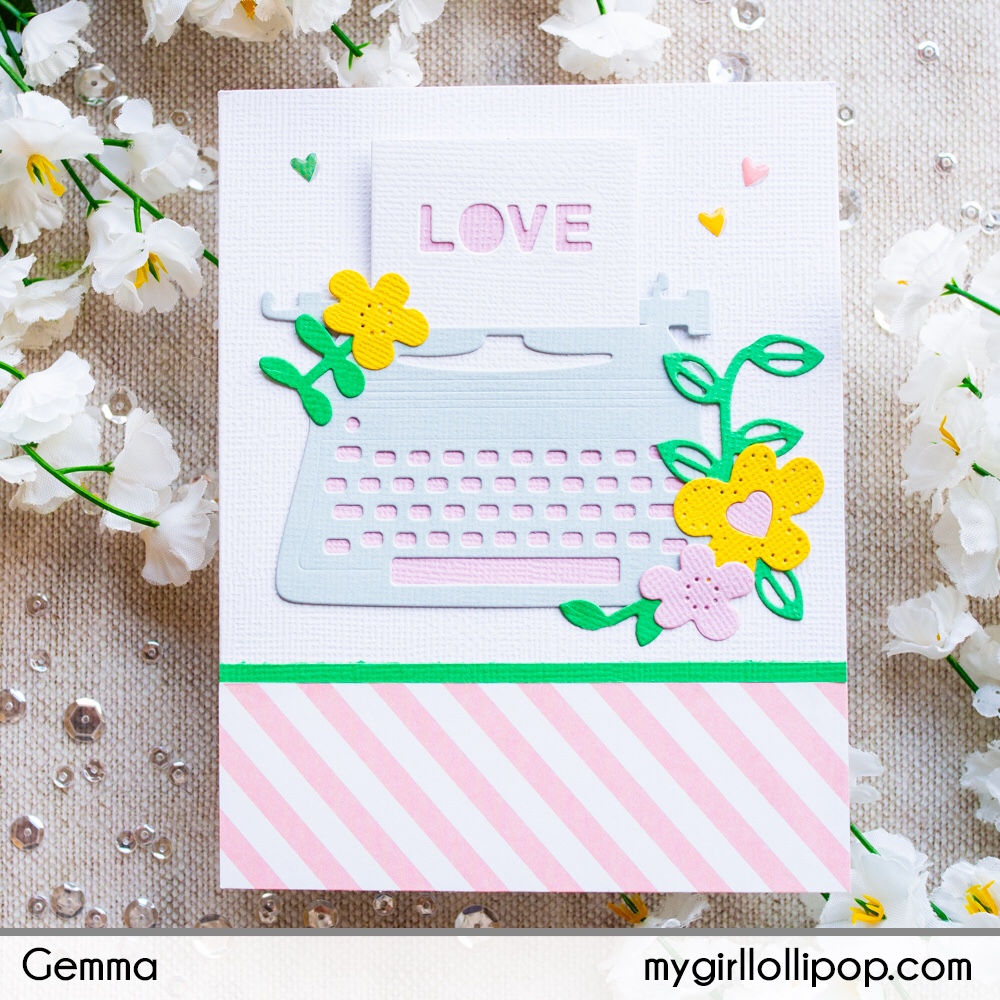
Card 7 – Vintage Typewriter:
- Cut a piece of patterned paper to 1 1/2 x 4 1/4”. Adhere onto the card base.
- Adhere a thin cardstock strip above the patterned paper.
- Die cut the typewriter, flowers, leaves and typewriter paper from cardstock. Die cut one of the word dies from the typewriter paper.
- Layer a contrasting colour of card stock behind the typewriter and word.
- Adhere the die cuts flat to the card, with some foam squares just behind the top of the typewriter paper.
- Add some heart stickers.
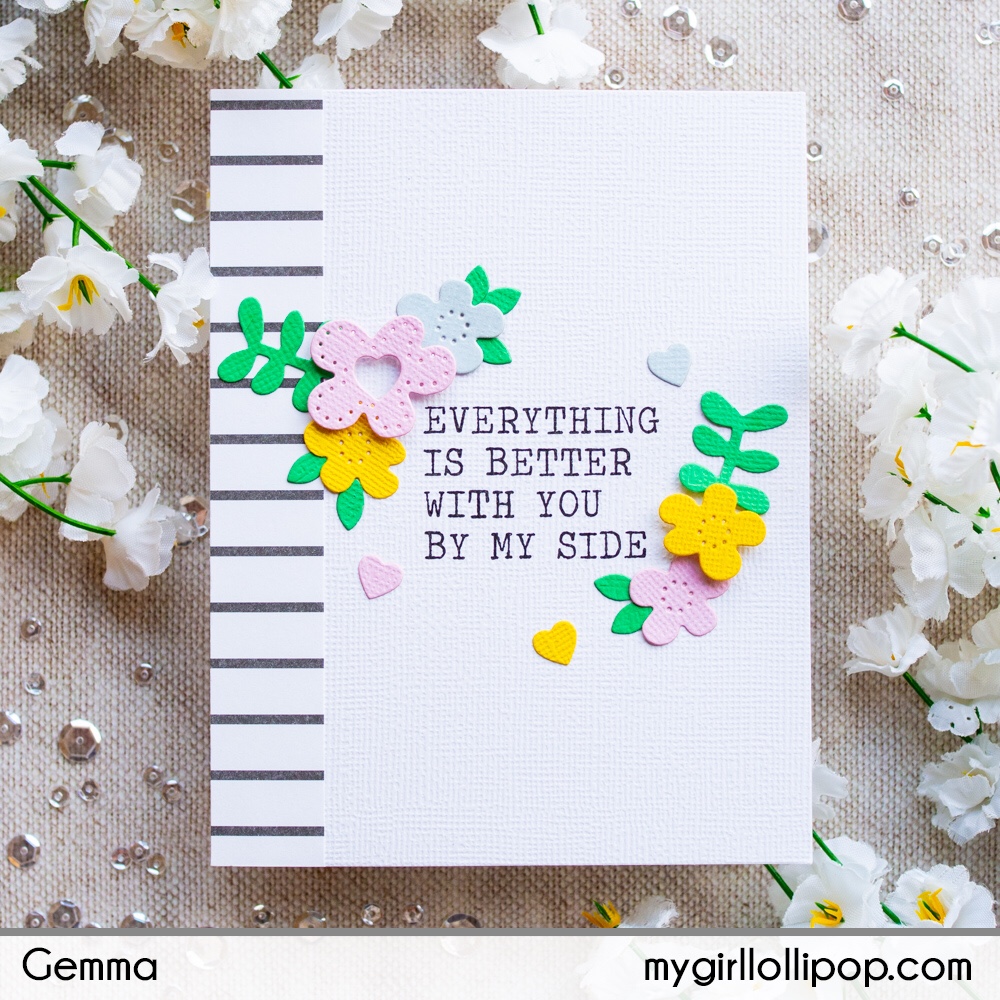
Card 8 – Floral Frame:
- Cut a strip of patterned paper to 3/4”. Adhere onto the card base.
- Stamp a sentiment with black ink.
- Die cut the flowers and leaves from cardstock.
- Adhere most of the die cuts flat to the card, using foam squares for two of the flowers.
Card 9 – You’re Just My Type:
- Cut 3 strips of patterned paper, each 3/8” wide. Adhere onto the card.
- Add the 3D die cut shapes at an angle over the top, using foam squares.

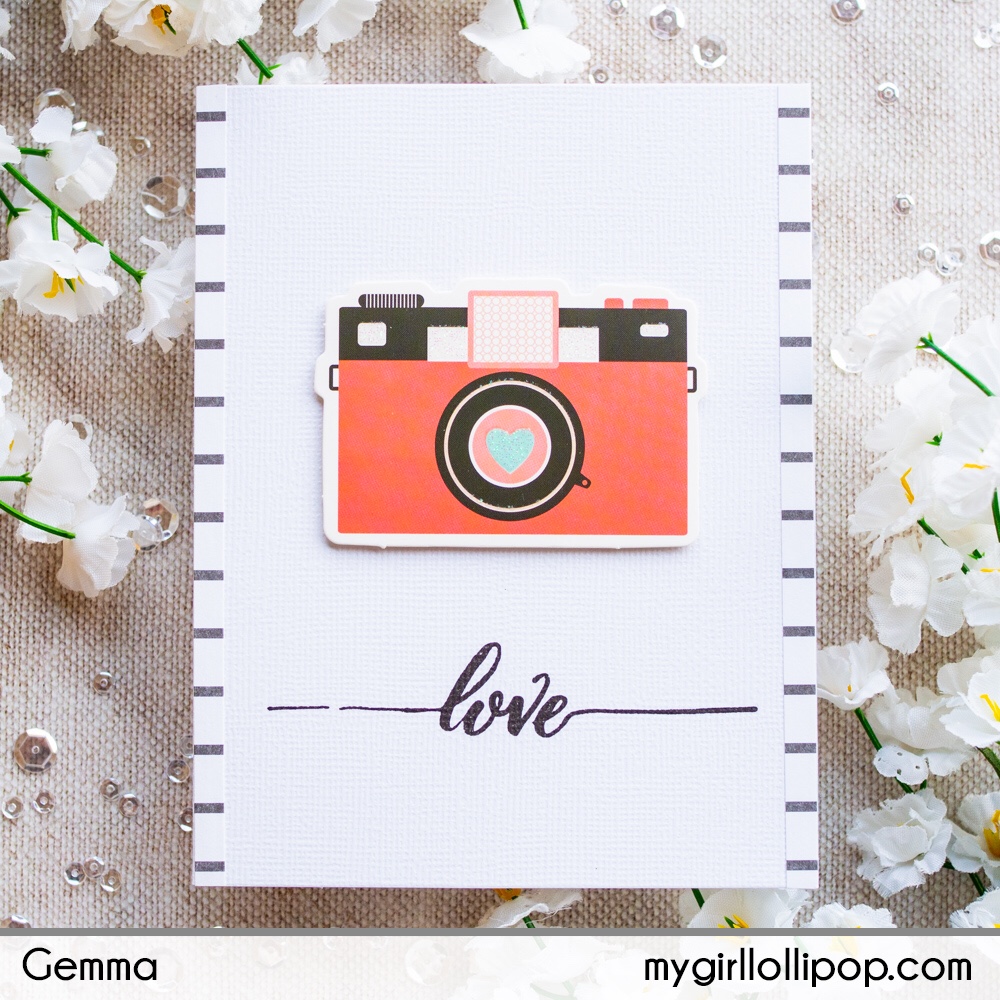
Card 10 – Camera:
- Cut 2 strips of patterned paper, each 1/4” wide. Adhere onto the card.
- Add the camera die cut shape, using foam squares.
- Stamp a greeting underneath with black ink.
Thanks for joining me today. I hope you enjoyed seeing the cards I made with this fabulous kit.
Here is a link to the Card Kit of the Month and FAQs about the kits.

1 thought on “Spellbinders January 2019 Card Kit – 10 Cards 1 Kit”
Comments are closed.