
Today I’m sharing cards made with the Spellbinders March 2019 card kit. The kit is packed full with everything you need to make at least 10 cards. It’s definitely possible to make more, though.

The Spellbinders card kit is a monthly subscription. You can also purchase the kit extras separately, if you only want select items or would like more embellishments.
Spellbinders have several Value Club options available for those who would like to join multiple clubs at once.
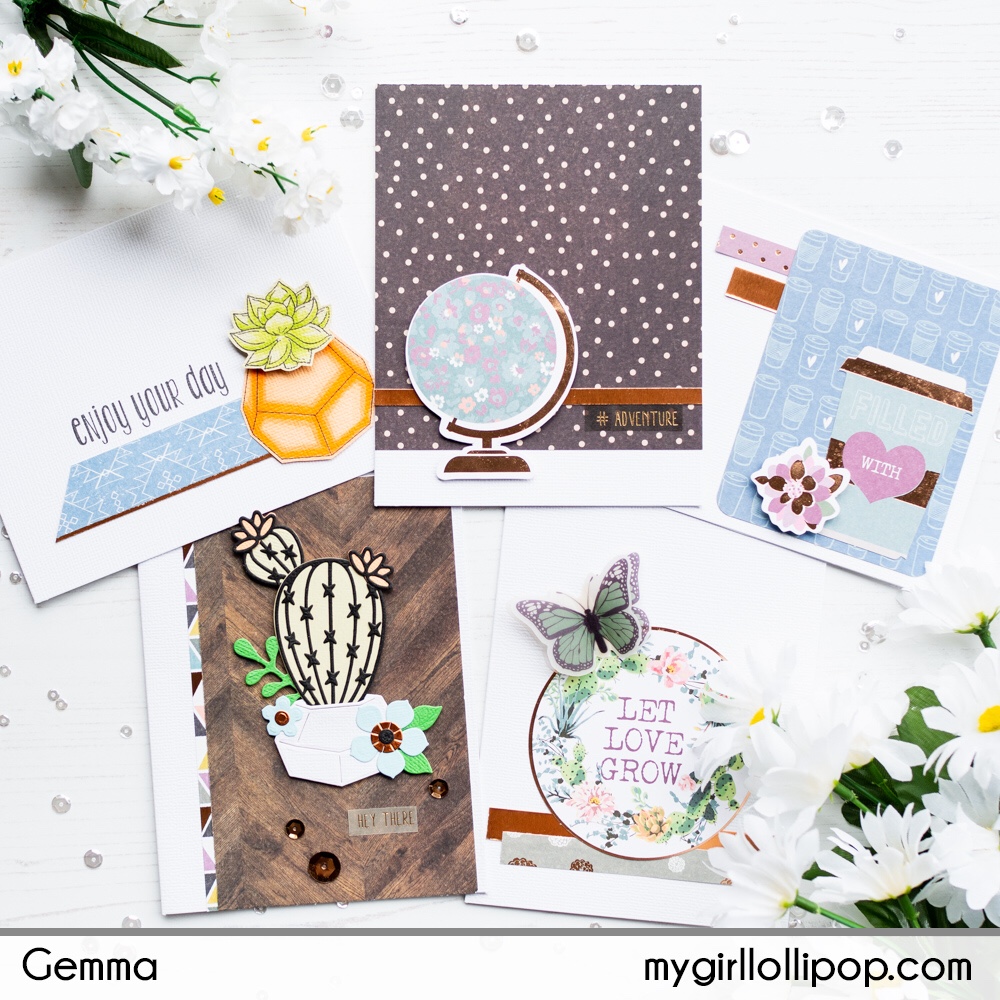
The March 2019 card kit is called ‘Relax & Enjoy’. I just love the colour palette of this kit and the foiled metallic copper accents. It has a fabulous vintage vibe to it.
In the kit, you get the following items:
- 10 textured white card bases with envelopes
- Set of 21 dies
- Patterned paper pad
- Stamp set
- Sequins
- 7 pieces of card stock
- Butterfly vellum stickers
- Die cut shapes
- Journal cards
- Sentiment stickers
- Double sided tape
- Foam squares
I used the kit to make 10 cards. The only items I used in addition to the kit contents were:
- Liquid adhesive (for the sequins and smaller embellishments)
- Foam tape (I like to use a lot of foam tape so needed more than was included in the kit)
- Alcohol friendly black ink
- Copic Markers
- Spellbinders Platinum 6 die cutting machine
- Stamping platform
Here are the cards I made:
Card 1 – It’s a Great Day
- Cut 2 strips of patterned paper, one slightly wider than the other, and adhere them to a card base
- Adhere two of the die cut houses flat on to the card
- Adhere the middle house with foam tape
- Add a sticker sentiment below the houses

Card 2 – Live Life Outside the Lines
- Cut a panel of striped patterned paper and thin black card strip, them adhere to a card base
- Adhere a sticker sentiment and two strips of patterned die cut strips to the card, staggering the edges so they sit outside the patterned paper background.
- Add some sequins around the card

Card 3 – Floral Print
- Cut a piece of paper to the same height as a card base but not as wide
- Add a thin black card strip to the edge of the paper
- Adhere the patterned paper to the card base
- Add a sticker sentiment, vertically aligned
(This card only uses the kit extras)

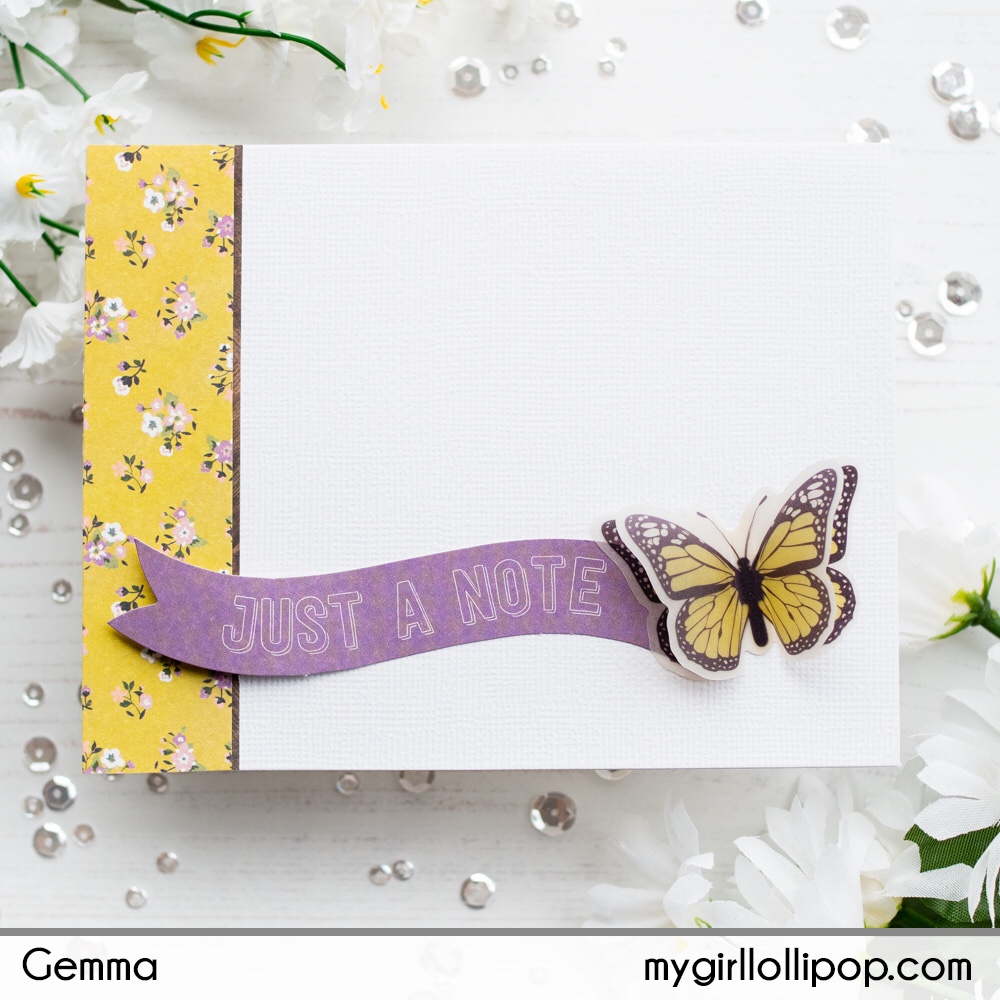
Card 4 – Just a Note
- Cut a strip of patterned paper, add a thin strip of contrasting patterned paper on one edge, then adhere to a card base
- Adhere a die cut banner shape using double sided tape,
- For dimension, add a small piece of foam tape just at the end of the banner overlapping the patterned paper
- Add a vellum butterfly to the other end of the banner
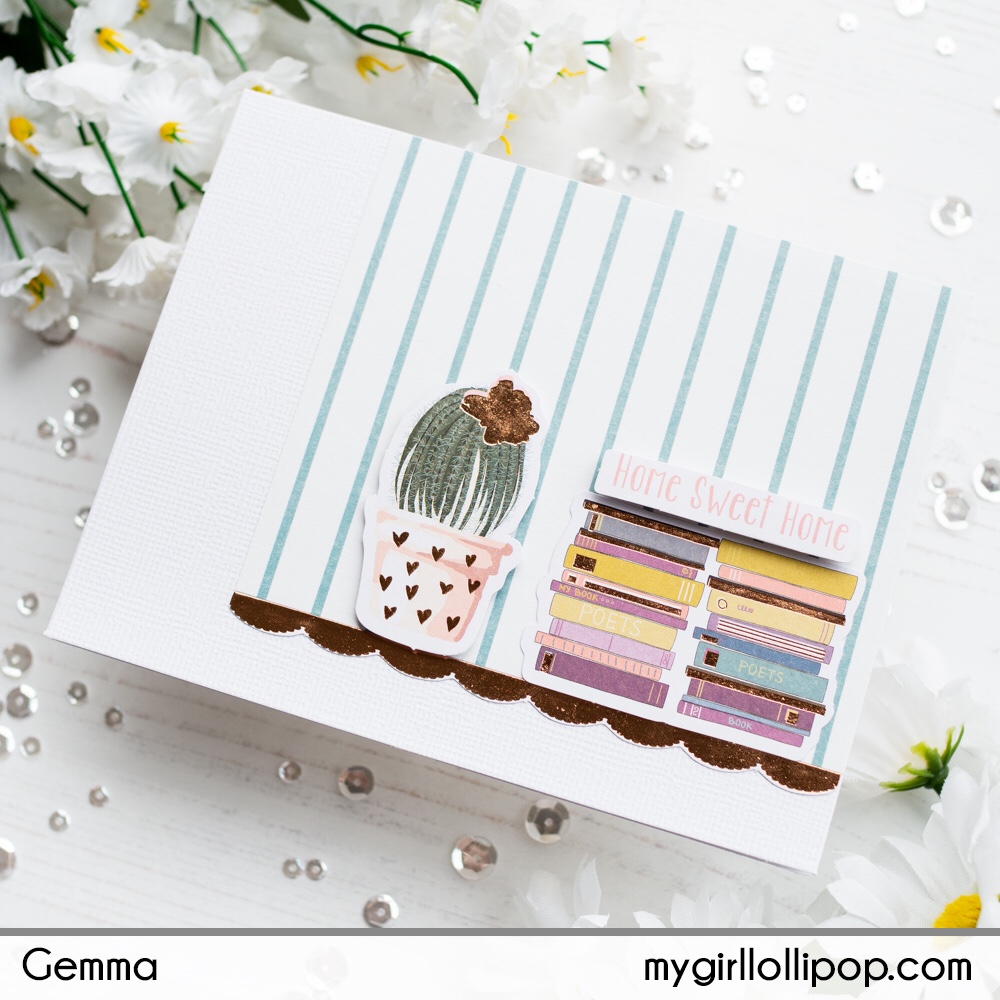
Card 5 – Home Sweet Home
- Adhere a panel of striped patterned paper to a card base
- Adhere the mirror card die cut shape border underneath, to act as a shelf.
- Add the die cut stack of books on the shelf
- Add the die cut cactus and sentiment strip with foam tape
Card 6 – #Adventure
- Adhere a piece of patterned paper to a card base, leaving a space at the bottom edge to ground the die cut shape
- Add a strip of mirror card
- Adhere the globe die cut shape with foam tape
- Add a vellum sentiment sticker under the mirror card strip

Card 7 – Filled with Love
- Cut two strips of patterned paper and card
- Add the strips behind a journal card so they show outside
- Adhere the journal card and strips to a card base
- Add some die cut shapes to the journal card, using foam tape on the top most shape for dimension

Card 8 – Let Love Grow
- Adhere a strip of mirror card and another of patterned paper, layered together on the card base
- Adhere the die cut circle sentiment shape over the top
- Add a vellum butterfly

Card 9 – Hey There Cactus
- Die cut the cactus, flowers and pot from card included in the kit
- Adhere a piece of dark patterned paper, with an additional fun patterned paper edge, to a card base
- Add the die cut cactus with foam tape
- Adhere a vellum sentiment and some sequins to the card

Card 10 – Enjoy Your Day
- Stamp images from the stamp set onto card included in the kit, then fussy cut out
- Add some copic marker shading – I used YG01, YG03, YR000, YR02, YR04
- Cut a patterned paper banner and add a thin mirror card edge
- Adhere the banner flat to the card base
- Stamp a sentiment with black ink above the banner
- Adhere the stamped images with foam tape

Thanks for joining me today. I hope you enjoyed seeing the cards I made with this fabulous kit.

1 thought on “Spellbinders March 2019 Card Kit – 10 Cards 1 Kit”
Comments are closed.