I was excited to get the opportunity to use the Spellbinders February 2019 Amazing Paper Grace Die Of The Month Kit. The dies in this kit are so elegant and really versatile.
The February kit contains 11 dies (one of which cuts two flowers). The large frame die cuts a 5 x 7 inch rectangle, which scores down the centre and along one of the long edges. This would be perfect for gate fold card designs.
I used the intricate dies in the kit as background elements on my cards. I decided on a colour scheme of pink and copper, creating two different looks to share today.
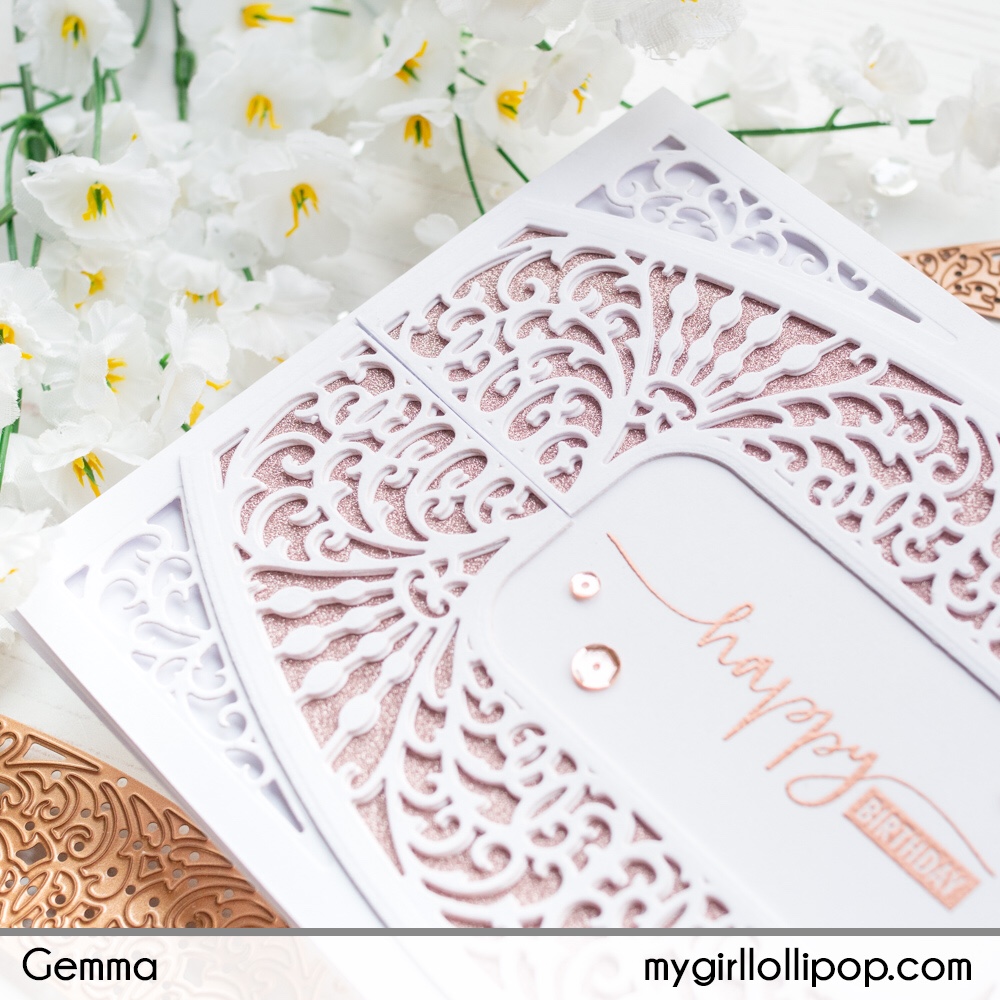
Card 1:
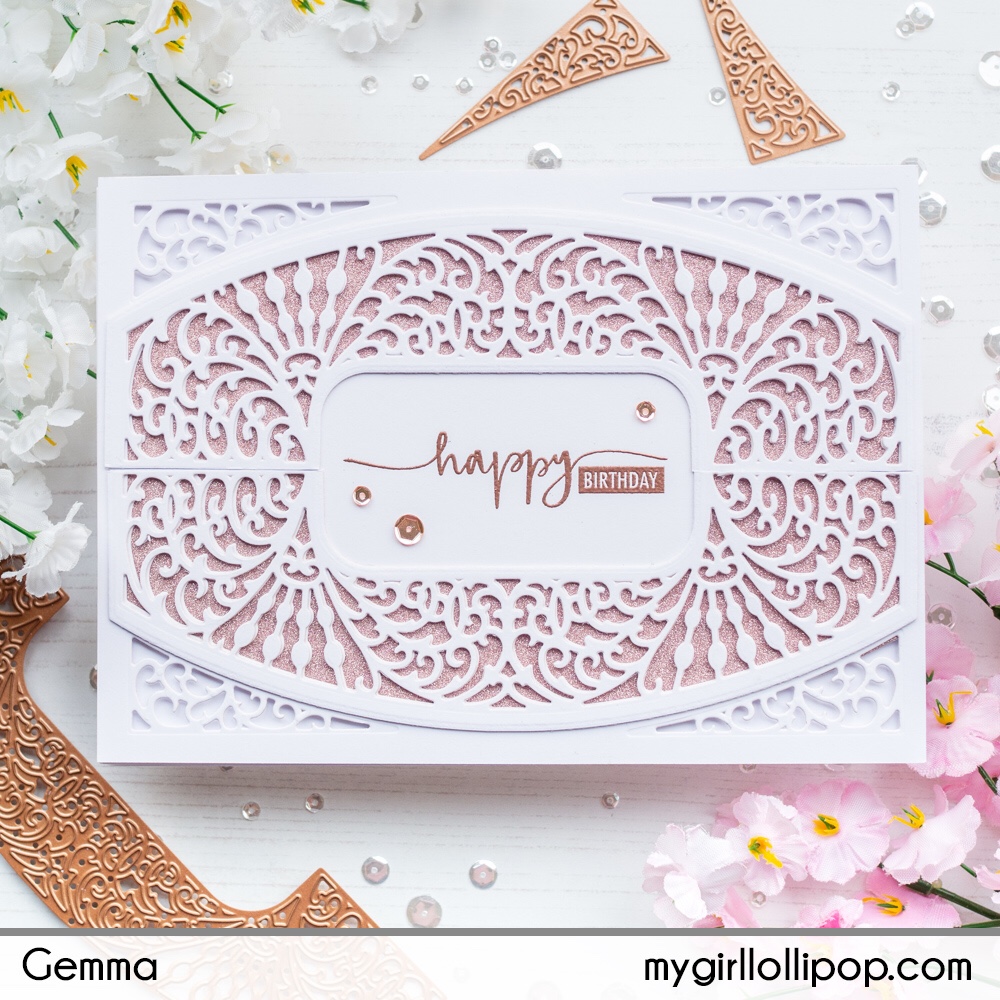
I began with a piece of white card, cut to 5×7 inches. I drew a faint pencil line across the card, at the 2.5 inch centre point. I used this line to help me place the arch die, then ran this through my Spellbinders Platinum 6 machine. I then rotated the die to the other side, lining up against the pencil line again and running through my die cutting machine.
I repeated this a couple more times to get three panels. On one of these panels, I lined up the four corner dies and cut them out from the card too. This is the background panel.

On the other two panels, I used my paper trimmer to cut along the pencil line, then used the arch frame die from the kit to cut out the four arches. I glued the pairs together to get two stacked dies.
Behind the background panel, I adhered two pink glitter arches, die cut with the arch frame die. Before adhering the background panel to my card with foam tape, I heat embossed a sentiment from Avery Elle, using WOW Metallic Copper embossing powder.
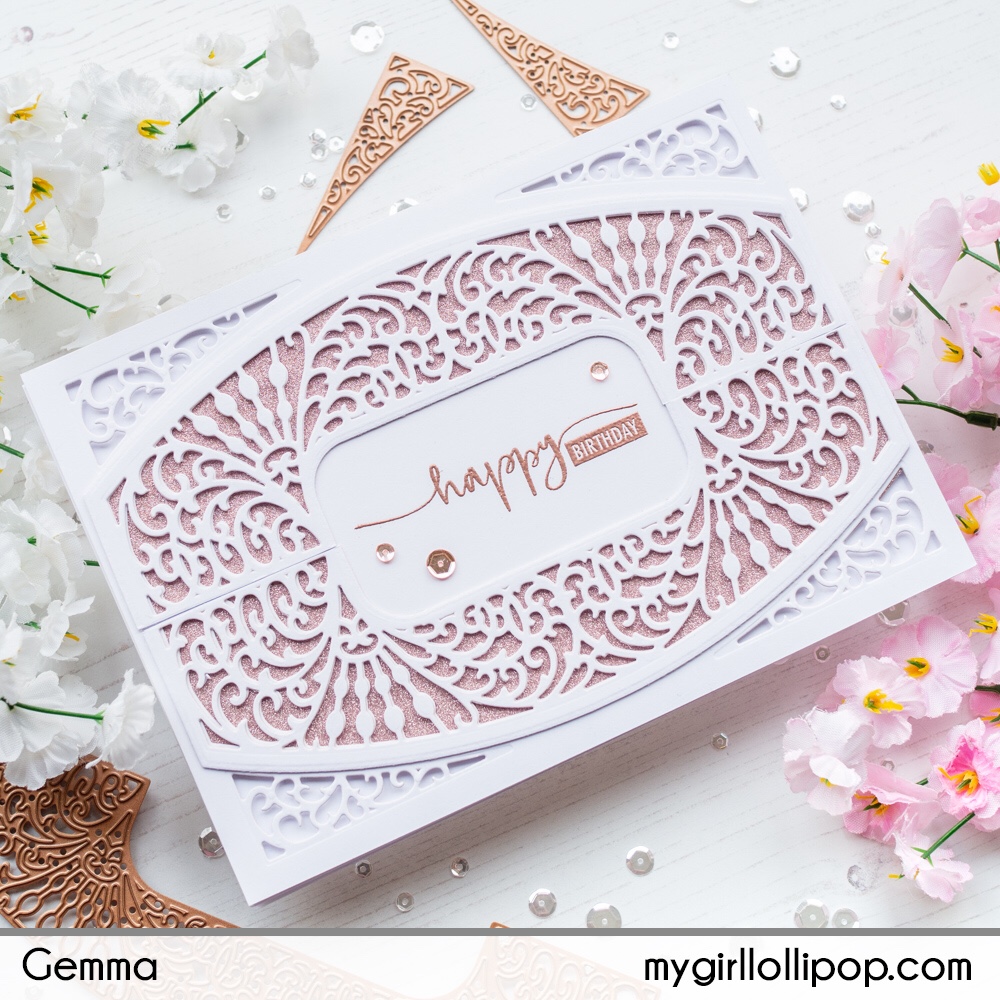
I then added the stacked decorative arches on top for some beautiful dimension. To finish, I added a few PPP rose gold sequins around the sentiment.
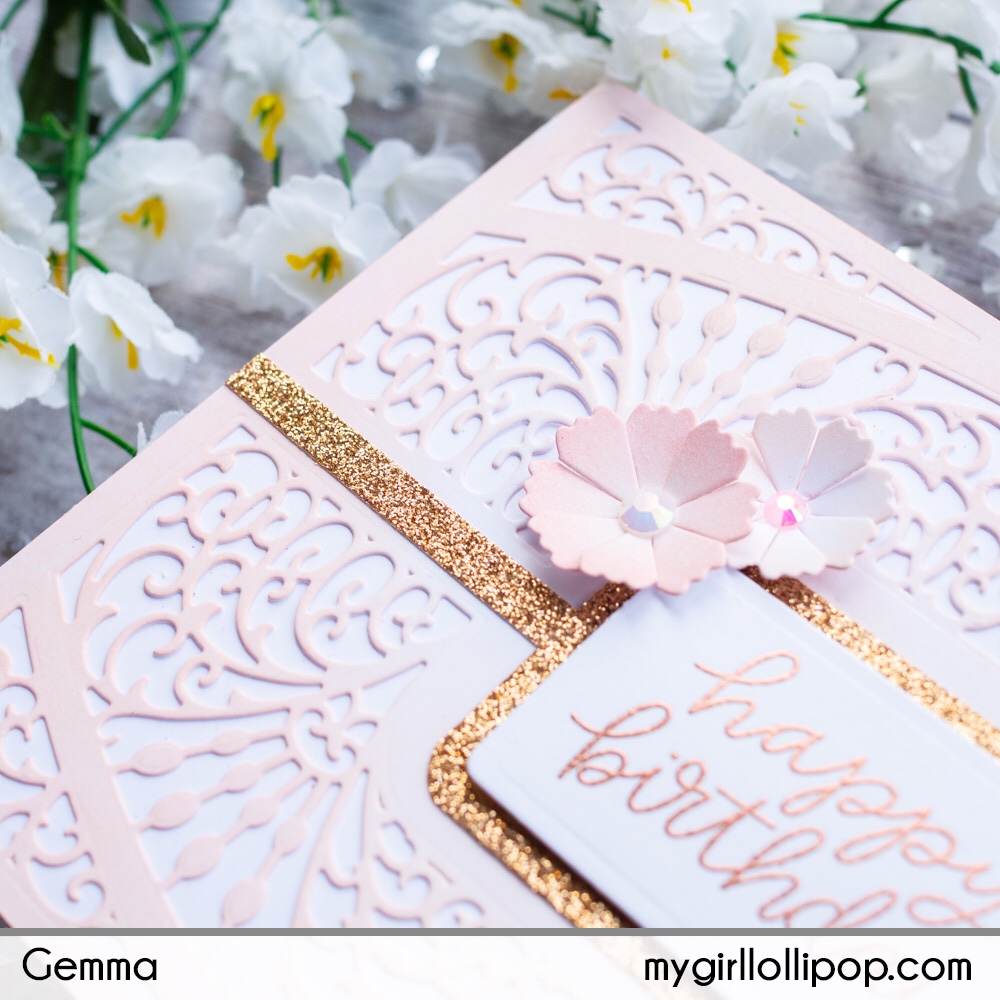
Card 2:
For my second card, I followed the same beginning step as card 1, to create a 5×7 inch background panel with the detailed dies from the set. On this, I blended on tattered rose and spun sugar distress oxide inks. I spritzed the panel with shimmer spray, then adhered it to a white card base.
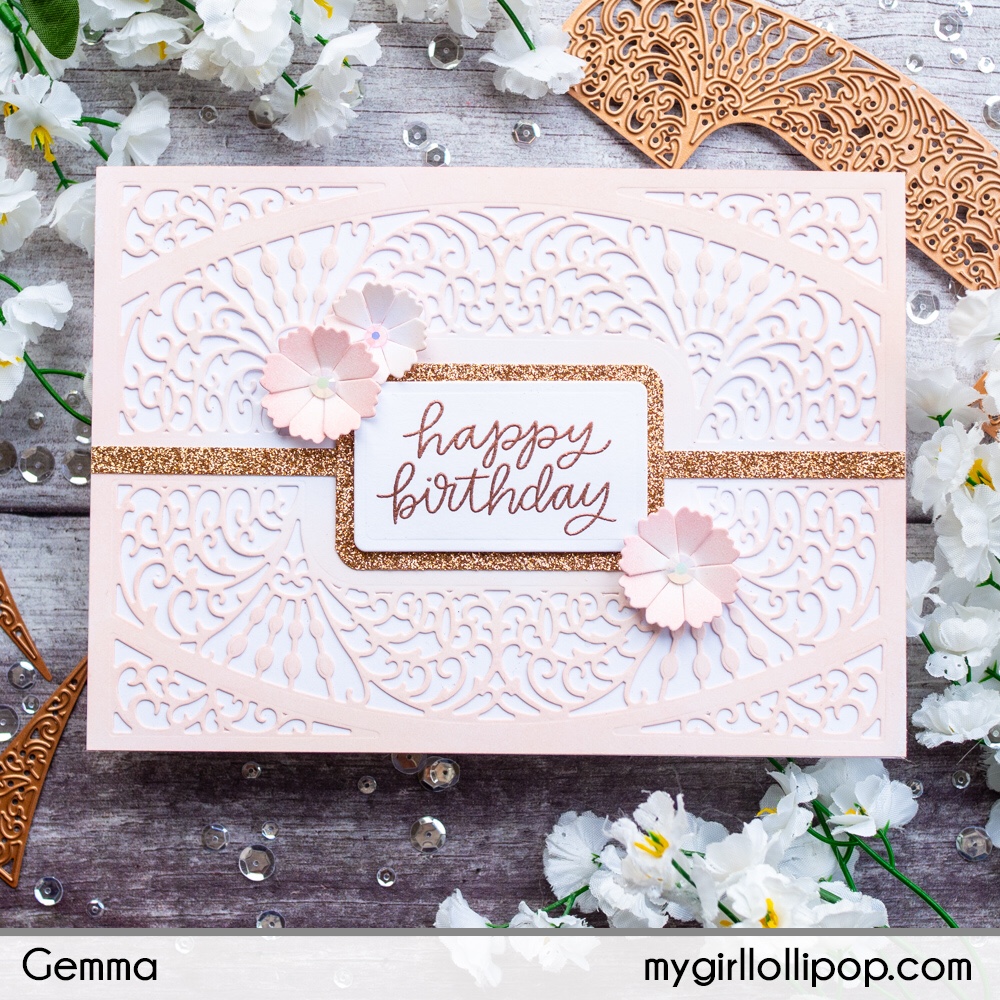
I used the small rectangle die included in the kit to die cut a panel for my sentiment. I used the WOW Metallic Copper embossing powder to emboss a sentiment from Pretty Pink Posh. I layered this with foam tape onto a copper glitter card rectangle, which I had cut with my paper trimmer and rounded the corners with a 1/4 inch corner chomper.
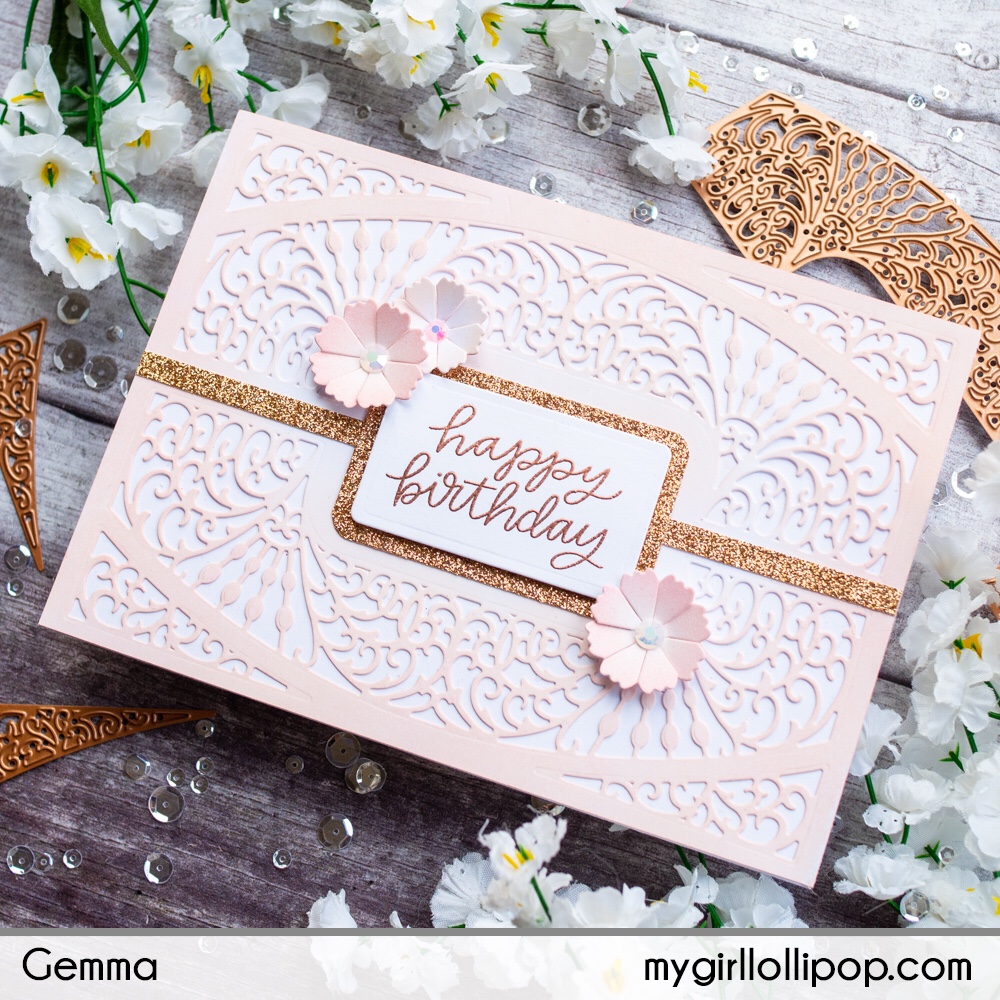
I cut a thin strip of copper glitter card, adhering across the centre of the panel. Then added the sentiment panel on top.
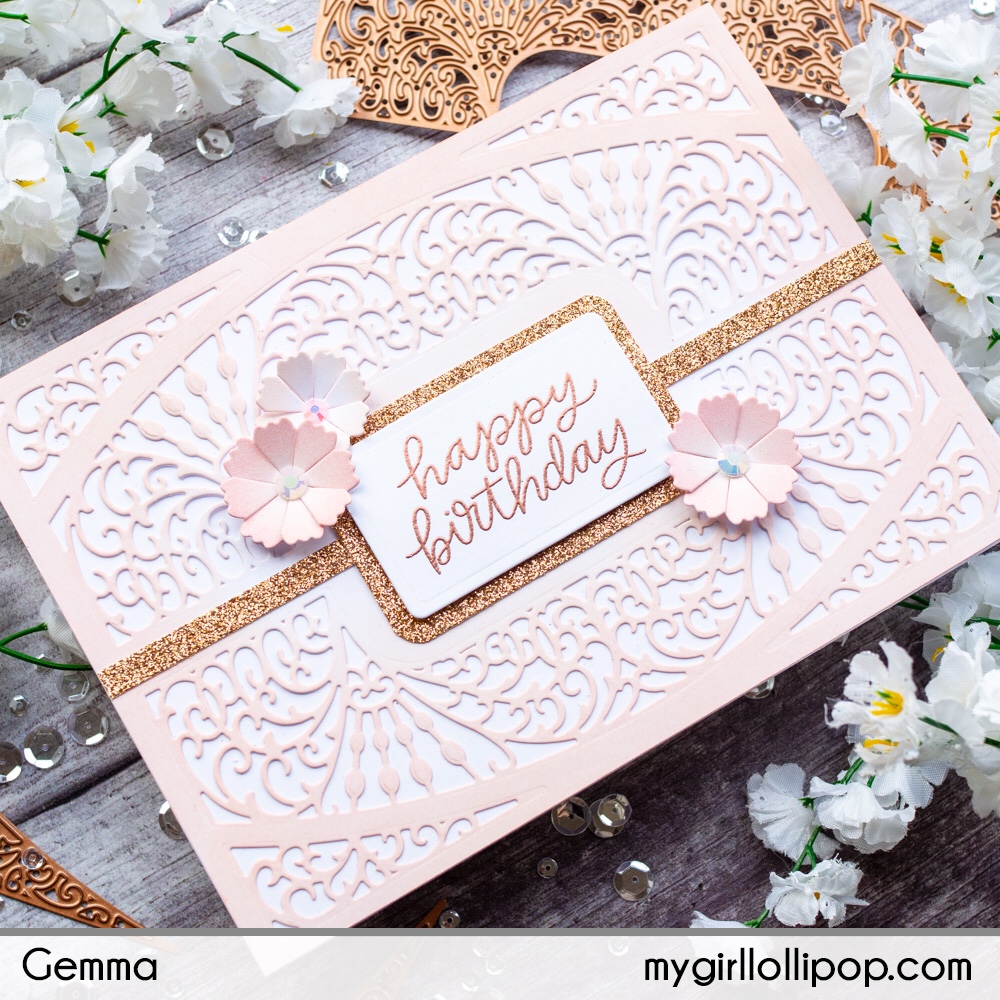
I die cut some flowers using the die included in the kit. I added colour with the same pink distress oxide inks as the background, then adhered them to my card. I finished by adding some Pretty Pink Posh jewels to the centre of the flowers for a touch of sparkle.