
Today I’m sharing cards made with the Spellbinders October 2019 card kit. The kit is packed full with everything you need to make at least 10 cards. It’s definitely possible to make more, though.
The Spellbinders card kit is a monthly subscription. You can also purchase the kit extras separately, if you only want select items or would like more embellishments. For those that want to join multiple clubs and save, Spellbinders offers Value Clubs.
There are also two new Value club options now available:
- Glimmer ‘n Cut – small die, large die and glimmer kits of the month
- Glimmer Groupie – small die, large die, card and glimmer kits of the month
The October 2019 card kit is called ‘Sparkling Holidays’. This is a fabulous kit for making your holiday cards, with a really pretty colour palette.
In the kit, you get the following items:
- 10 textured white card bases with envelopes
- 9 pieces of smooth cardstock, including metallic silver
- Set of 6 dies
- Paper pad
- Stamp set
- Gemstones
- Die cut shapes
- Sticker pack
- Double sided tape & foam squares
I have 4 cards to share using the kit. The only items I used in addition to the kit contents were:
- Liquid adhesive (my preferred adhesive type)
- Foam tape (I like to use a lot of foam tape so needed more than was included in the kit)
- Corner chomper
- Silver thread
- Black ink
Here are the cards I made:
Card 1
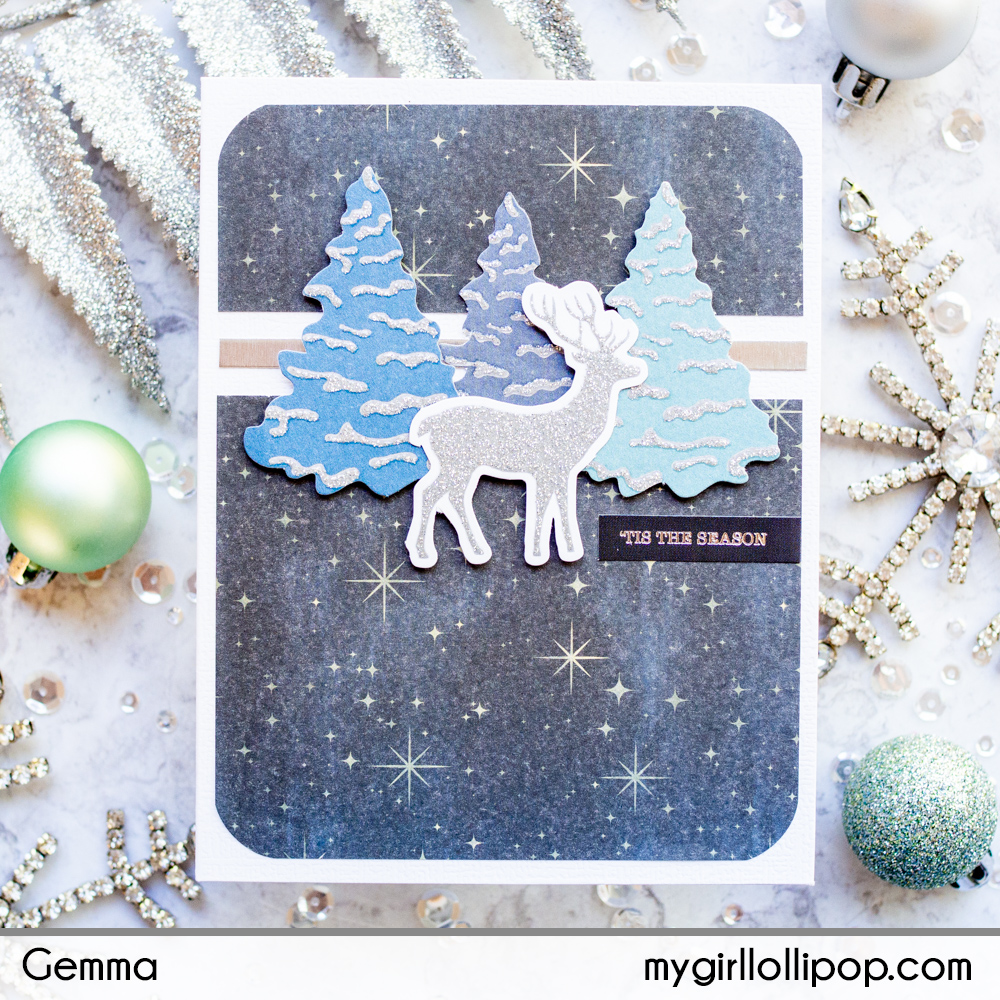
- Cut a piece of patterned paper and round the corners.
- Trim across the panel to get two pieces, then adhere on the card base to leave a gap.
- In the gap, add a strip of silver mirror card.
- Adhere three die cut tree shapes, popping two up with foam tape.
- Add a reindeer die cut shape in front and a sticker sentiment.
Card 2

- Adhere a piece of patterned paper to a card base, along with some die cut branches.
- Add silver thread behind three of the die cut bauble shapes, then adhere to the card, using foam tape for two of the baubles.
- Stamp a sentiment with black ink.
- Add a stacked die cut sentiment underneath.
Card 3

- Adhere a piece of patterned paper to a card base
- Adhere three strips of card across the width.
- Add the mouse and sentiment from the sticker pack, and a few adhesive gemstones.
Card 4

- Cut a piece of patterned paper and adhere to lower portion of card base.
- Add a silver mirror card strip above.
- Add a snow globe sticker and some die cut star shapes.
Thanks for joining me today. I hope you enjoyed seeing the cards I made with this fabulous kit.
