

Today I’m sharing cards made with the Spellbinders December 2019 card kit. The kit is packed full with everything you need to make at least 10 cards. It’s definitely possible to make more, though.
The Spellbinders card kit is a monthly subscription. You can also purchase the kit extras separately, if you only want select items or would like more embellishments. For those that want to join multiple clubs and save, Spellbinders offers Value Clubs.
There are also two new Value club options now available:
- Glimmer ‘n Cut – small die, large die and glimmer kits of the month
- Glimmer Groupie – small die, large die, card and glimmer kits of the month

The December 2019 card kit is called ‘Hey Foxy’. It has pretty florals with a pink and green colour palette, along with gold accents. My favourite part of the kits is always the pack of die cut shapes, as they make it so easy to create beautiful cards.
In the kit, you get the following items:
- 10 textured white card bases with envelopes
- 9 pieces of smooth cardstock, including a sheet of gold mirror card
- Set of 9 dies
- Paper pad
- Stamp set
- Double sided tape
- Foam squares
- Sequins
- Die cut shapes
- Sticker pad
- Alphabet stickers
I have 6 cards to share using the kit. The only items I used in addition to the kit contents were:
- Liquid adhesive (my preferred adhesive type)
- Extra foam tape
- FSJ Journey Rectangles die set
- FSJ Journey Circles die set
Here are the cards I made:
Card 1
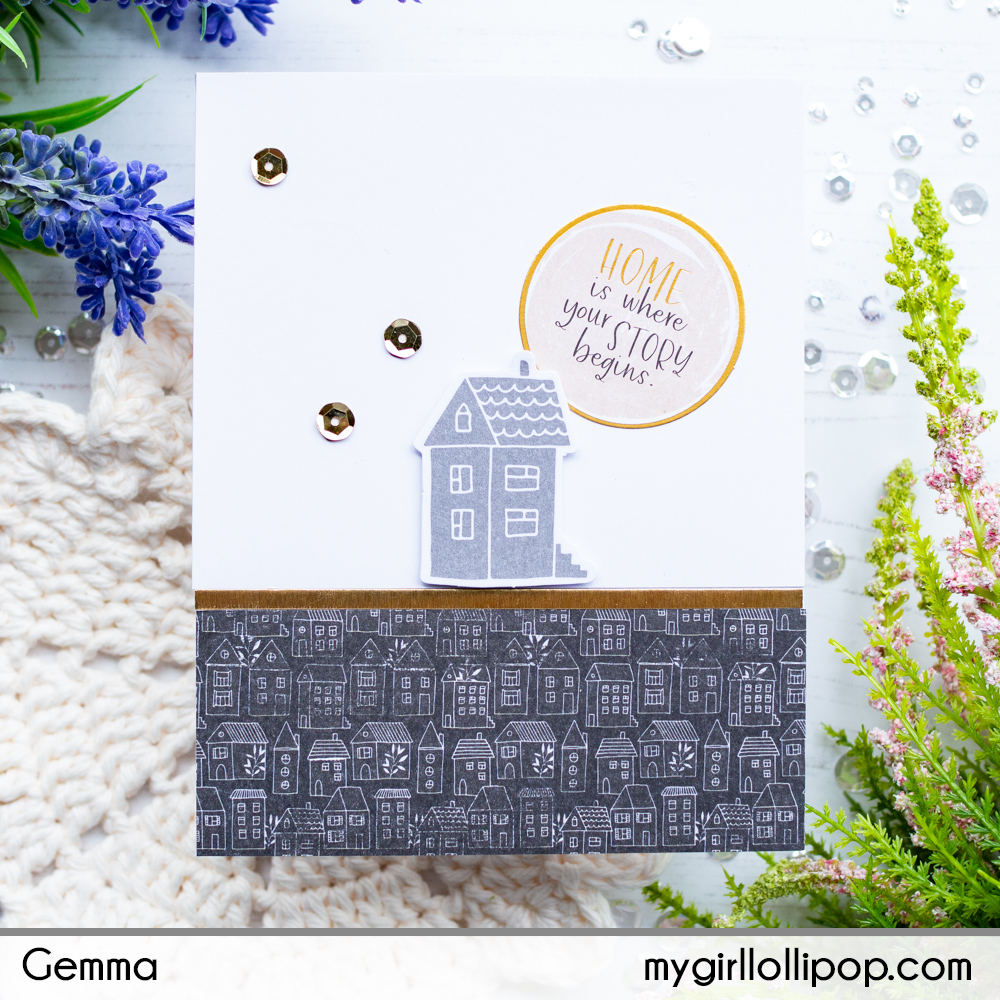
- Add a piece of patterned paper to the lower portion of a card base and smooth white card at the top.
- Adhere a strip of gold card between them.
- Use foam tape to add the house die cut shape.
- Adhere a circle sticker next to the house.
- Finish with some sequins.
Card 2

- Adhere two thin strips of striped patterned paper to the edges of a card base.
- Adhere a wreath die cut shape in the centre.
- Use foam tape to add a die cut shape sentiment across the wreath.
- Finish with some sequins.
Card 3

- Adhere a strip of patterned paper to the right side of a card base.
- Add a thin strip of gold card next to the patterned paper.
- Place some flower and leave die cut shapes on the paper, using foam tape for the top most flower.
- Add some sequins.
- Adhere a banner sentiment die cut shape, using a sentiment sticker to change the greeting, if desired.
Card 4

- Cut a panel of patterned paper, use a die from FSJ Journey Rectangles die set to add dot details, then adhere the paper to a card base.
- Use the FSJ Journey Rectangles die set to create a frame from the gold mirror card, then adhere to the card.
- Cut a circle of pink card, using the FSJ Journey Circles die set.
- Add a sticker to the pink card circle, then use foam tape to add to the card.
- Adhere some sequins around the sentiment
Card 5

- Cut two strips of pink card.
- Adhere some patterned paper to the strips, leaving some of the pink card showing.
- Adhere thin strips of gold mirror card over the patterned paper, then add these to a card base.
- Place some die cut flowers and leaves, using foam tape for the top most flower.
- Use foam tape to add a large die cut shape sentiment and a butterfly.
- Finish with a sentiment sticker
Card 6

- Adhere some patterned paper to the lower portion of a card base.
- Add a thin strip of gold card above the patterned paper.
- Adhere some die cut shape flowers, butterfly and sentiments, using foam tape to add dimension here and there.
- Finish with a sentiment sticker along the edge of the patterned paper
Thanks for joining me today. I hope you enjoyed seeing the cards I made with this fabulous kit.
