
I was inspired by a recent video that I saw by Jennifer McGuire, where she used selective die cutting to create a fun top edge to a card.
I love to find additional ways to use coordinating dies, so I thought I’d try making my own version with the tiny ninjas.

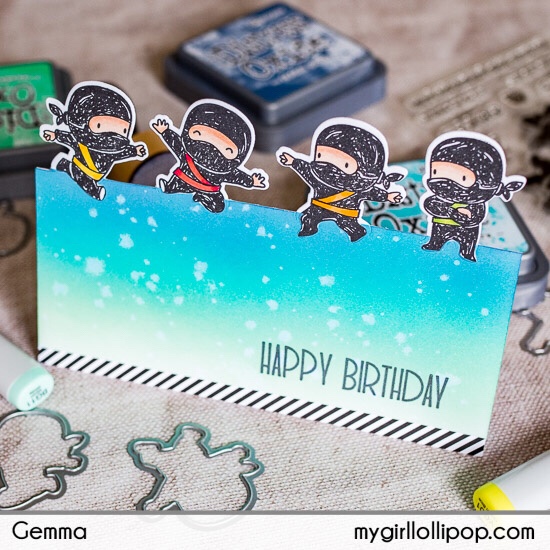
My usual card base size is A6 so I began by cutting a piece of white card at A5 size (148 x 210 mm). Along the shortest edge, I drew a faint pencil line down the card at the mid point (105 mm) I positioned four dies so that the bottom edge of the dies were below the pencil line.
When running it through my die cutting machine, I placed the top cutting plate so it lined up with the pencil line. It then cuts only the portion of the dies above the pencil line.

Using a craft knife, I cut away the rest of the card above the line. I then erased the pencil marks.
I stamped the ninja images on the die cut shapes, then coloured them with alcohol markers. I masked the images, then blended on some distress oxide inks and flicked it with water droplets.

I cut down a landscape top folding A6 card base, so that once the die cut piece was added to the top, it still fits into a C6 envelope.
Before adding the top panel, I trimmed the panel down a little more so that I could add some black and white patterned paper to the bottom edge. Once I’d adhered the die cut piece to the card base, I added a birthday sentiment to finish the card.
I recommend watching the video by Jennifer McGuire to see this technique in action. It’s easy to do and is a great effect on a card. It’ll work with any stamps and coordinating dies too. I made a similar card with the MFT Monster Sized stamps and dies, and I’ll definitely be making more cards like this as I love the technique.


I love your off the edge die cutting. I need to watch the video and try the technique this weekend.
LikeLiked by 1 person